初识 Rails 中的 Stimulus controller。
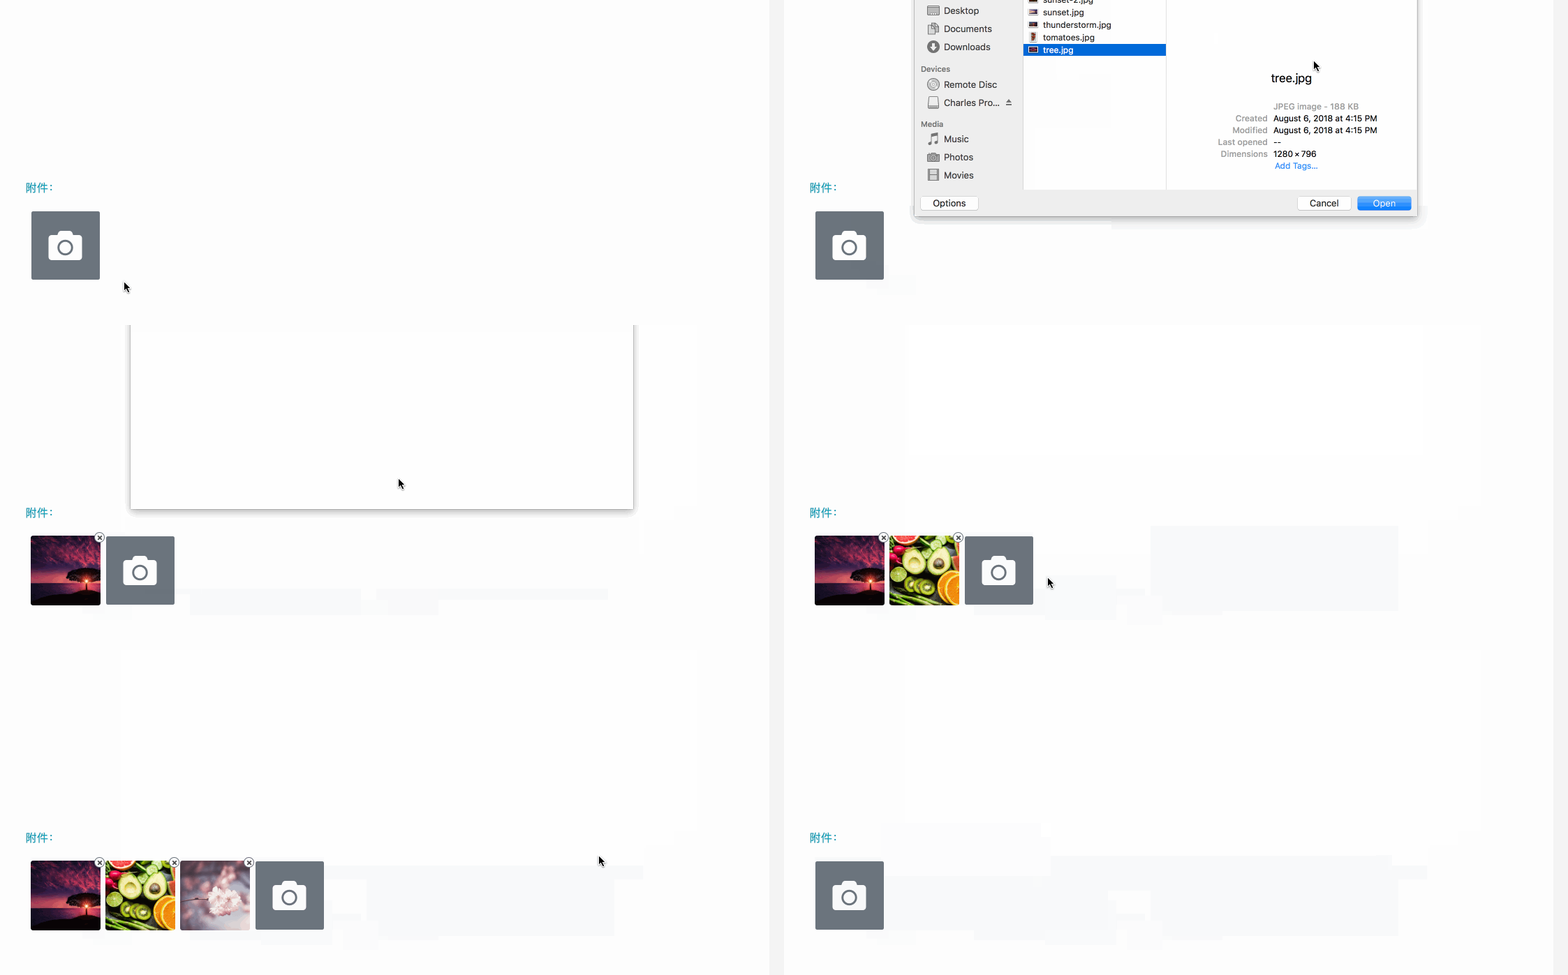
实现效果

基本流程:点击按钮,上传图片,预览图片,用户可以清除已上传的图片。demo中没体现出来的还有上传文件的的格式检查,图片上传个数的限制以及图片预览时的裁剪。
这类效果实现,网上有不少前辈已经给出了很好的代码参考。这里仅记录下在Rails项目中,如何借助stimulus,实现以上效果。其中CSS部分,引用了Bootstrap。
HTML部分
<% template = capture do %>
  <label class="d-flex align-items-center justify-content-center upload-area rounded bg-secondary border border-light m-0" data-action="click->attachment#checkNumber">
    <i class="fas fa-camera fa-3x" style="color: white;"></i>
    <input name="attachment[file]" type="file" class="d-none" data-action="change->attachment#uploadAttachment">
  </label>
<% end %>

<% image_item = capture do %>
  <div class="prev-item mr-2">
        <span class="closebtn rounded-circle border border-secondary text-muted text-center bg-light" data-action="click->attachment#removeAttachment">
        </span>
    <div class="cover rounded">
      <img src="">
    </div>
  </div>
<% end %>

<p class="text-info">附件:</p>
<%= content_tag :div, class: "bg-light p-2", data: { controller: "attachment", max_upload_count: max_attachments_count, template: template, image_item: image_item } do %>
  <div class="preview"></div>
  <label class="d-flex align-items-center justify-content-center upload-area rounded bg-secondary border border-light m-0" data-action="click->attachment#checkNumber">
    <i class="fas fa-camera fa-3x" style="color: white;"></i>
    <input name="attachment[file]" type="file" class="d-none" data-action="change->attachment#uploadAttachment">
  </label>
<% end %>
这里,用capture定义了两段html,其中,template对应的是图片上传前的那个label,每次上传完图片后,将这个空的label追加到后面,而image_item则用来预览每张图片,max_attachments_count为最多可上传的附件数量,把这三个一并传给attachment这个controller。
这里,有几个事件:
点击label会先触发click事件,对应的是controller里面的function checkNumber, 而上传后,触发了input的change事件,对应的是function uploadAttachment,最后预览图片时,添加了删除事件,对应的是removeAttachment ,下面针对这些事件进行处理。
JS部分【Stimulus controller】
在attachment_controller.jsx中,添加如下代码:
import { Controller } from 'stimulus'
import $ from 'jquery'
import './attachment.scss' //引入CSS部分,后面会附上该部分代码

export default class extends Controller {
  // 判断附件上传数量是否超出限制
  checkNumber(event) {
    const uploaded = $(this.element).find('label').length //目前label的数量,包括未上传文件的那个
    const attachmentCount = $(this.element).data('maxUploadCount') //获取传给controller的值
    if (uploaded - 1 >= attachmentCount) {
      event.preventDefault()
      alert(`最多可以上传 ${attachmentCount} 张图片!`)
      return false
    }
    return null
  }

  //上传文件时,触发事件
  uploadAttachment(event) {
    const html = $(this.element).data('template')
    const item = $(html)
    const $preview = $(this.element).find('.preview') // 存放预览图片的container
    const $imageItem = $($(this.element).data('imageItem'))
    const $imgTag = $imageItem.find('img')
    const file = $(event.currentTarget).get(0) // 获取到input

    // 检查上传文件是否是图片,如果是,则添加图片的预览,不是则弹出警告
    if (file.files[0] !== undefined) {
      const dataURL = this.createObjectURL(file.files[0]) //调用createObjectURL生成图片的URL
      const fileName = file.files[0].name
      const extension = fileName.split('.').pop().trim().toUpperCase()
      if (['JPG', 'JPEG', 'PNG'].includes(extension)) {
        $imgTag.attr('src', dataURL)
      } else {
        alert('请上传图片(格式为JPG、JPEG、PNG)')
        return false
      }

      $imageItem.appendTo($preview) // 将图片预览部分,追加到preview中
      $(event.currentTarget).parent().addClass('hidden') //已经上传过文件的input,对应的label隐藏
      item.appendTo($(this.element)) // 显示空白的文件上传按钮
    }
    return null
  }

  // 移除attachment
  removeAttachment(event) {
    event.preventDefault()
    const index =  $(event.currentTarget).parent().index()
    $(event.currentTarget).parent().remove()
    $(`label:eq(${index})`).remove()
  }

  // 获取图片的URL
  createObjectURL(blob) {
    if (window.URL) {
      return window.URL.createObjectURL(blob)
    } else if (window.webkitURL) {
      return window.webkitURL.createObjectURL(blob)
    }
    return null
  }
}
CSS部分
CSS部分,踩的坑主要是不知道如何裁剪图片,最终使用了CSS的clip: rect, 看了下W3school,里面对clip: rect 的描述感觉不够清晰,参考阅读CSS clip:rect矩形剪裁功能及一些应用介绍。此外,对于关闭按钮那块,用一个圆圈,内含一个X,但是一直无法让X对齐,后面微调对齐了,但是CSS部分的代码有些奇怪,height与inline-height并不相同,故closebtn部分请小心参考。
附上CSS部分的代码:【attachment.scss】
.upload-area {
  width: 100px;
  height: 100px;
}

.preview {
  display:block;
  float:left;
}

.prev-item {
  position:relative;
  display: inline-block;
  vertical-align: bottom;
}

.cover {
  width: 100px;
  height: 100px;
  overflow: hidden;

  img {
    max-height:100px;
    width: auto;
    clip:rect(200px 300px 300px 200px);
  }
}

.closebtn {
  position: absolute;
  right: -1px;
  height: 15px;
  width: 15px;
  margin-right: -5px;
  margin-top: -5px;
  line-height: 11px;
  font-size: 9px;
  padding: 2px;

  &::before {
    content: "\2716";
  }
}