这周在做微信公众号那块,手机验证是比较难啃的一块,Google后也没找到合适的指导,趁着周末,写下来,供日后参考。
以下以一个测试公众号虫虫宠物生活馆的手机认证为例。
场景描述
用户登录公众号后,需要绑定会员,会员数据库中含有用户的手机号等信息,需要用户先输入手机进行验证。
然后根据手机号来判定用户是否是会员。
类似下面这种:
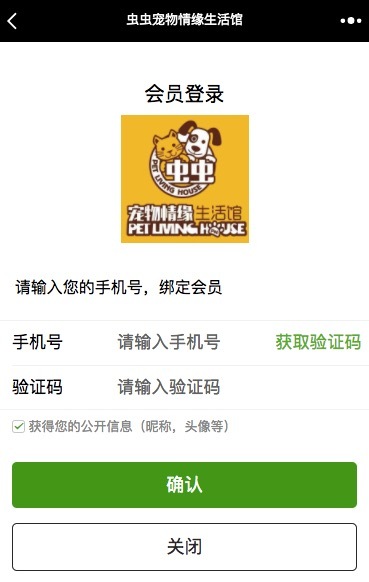
实现效果
用户输入手机后,点击获取验证码,第三方短信服务平台发送验证码信息,用户收到信息,输入验证码,完成绑定。
最后大致如下,这里没有用手机录屏了,在微信开发者工具上简单做个了动图,中间的白屏有些奇怪,手机上没有出现这种情况:
解决步骤
分解下任务:
- 点击获取验证码,验证手机号的有效性,并发送验证码到用户的手机上
- 输入验证码后,用户点击确认,验证手机号与验证码的有效性,无误后,跳转至主页
下面的代码示例,还是在wechat-starter的基础上进行功能添加 ,有关微信网页授权部分,可参见Rails对接微信公众号简易指南,这里只说手机验证。
不得不说,好的轮子真的可以节省很多时间,Thanks for OpenSource , Thanks for sharing :P
好,一步步来。
Step1、建手机验证的model phone_tokens
终端执行:
rails g model phone_token
在生成的migration文档中,修改成这样:
lass CreatePhoneTokens < ActiveRecord::Migration[5.1]
  def change
    create_table :phone_tokens do |t|
      t.string :phone
      t.string :token
      t.datetime :expired_at
      t.timestamps
    end
    add_index :phone_tokens, [:phone, :token]
  end
end
执行:
rake db:migrate
修改app/models/phone_tokenk.rb, 要求token ,phone 必填:
class PhoneToken < ApplicationRecord
  validates_presence_of :token
  validates_presence_of :phone
end
修改config/route.rb , 添加:
resources :phone_tokens, only: [:create]
Step2、建controller phone_tokens,实现手机验证码发送
执行:
rails g controller phone_tokens
修改app/controllers/phone_tokens_controller.rb
class PhoneTokensController < ApplicationController

  before_action :verify_phone_unrepeated

  def create
    unless params[:phone] =~ User::CELLPHONE_RE
      render json: {status: 'error', message: '手机号格式不正确!'}
      return
    end
    if session[:token_created_at] && session[:token_created_at] + 60 > Time.now.to_i
      render json: {status: 'error', message: '您已经申请过验证码,请60s后再试!'}
      return
    end

     ## 生成验证码
    token = sms_send(params[:phone])
    ## 初次生成验证码,新增record,验证码过期二次生成token,则更新record
    PhoneToken.add_or_update params[:phone], token
    render json: {status: 'ok'}
  end

  private

  def verify_phone_unrepeated
    phone = User.find_by(phone: params[:phone])
    render :json => { status: 'repeated'} if phone.present?
  end
end
这里添加了手机重复绑定的检查。其中,User::CELLPHONE_RE是定义在user.rb, 用正则验证手机号码有效,稍后会加上。
另外,生成验证码的method sms_send 我们在下一步调用第三方短信服务来实现。
而对于add_or_update 类方法,我们在app/models/phone_token.rb中定义,实现新增和更新:
修改app/models/phone_token.rb:
class PhoneToken < ApplicationRecord
  validates_presence_of :token
  validates_presence_of :phone

  def self.add_or_update(phone, token)
    record = find_by(phone: phone)
    if record
      record.update_attributes token: token, expired_at: Time.now + 10.minutes
    else
      create phone: phone, token: token, expired_at: Time.now + 10.minutes
    end
  end
end
Step3、调用第三方短信服务
这里,以阿里云的短信服务为例,官方文档的接口调用代码示例是Java,也没找到ruby的,google了下,有一个现成的gem aliyun-sms,用这个。
购买服务后,进行设置,你会得到四个参数值:
- ACCESS_KEY_SECRET
- ACCESS_KEY_ID
- SIGN_NAME
- TEMPLATE_CODE
开始调用吧!
修改gemfile:
gem 'aliyun-sms'
执行bundle,服务器重启.
修改config/applicaton.yml,将重要的参数值放进去,供调用:
access_key_secret: "ACCESS_KEY_SECRET"
access_key_id: "ACCESS_KEY_ID"
sign_name: "SIGN_NAME"
template_code: "TEMPLATE_CODE"
新增文件config/initializers/aliyun-sms.rb, 内容如下:
Aliyun::Sms.configure do |config|
  config.access_key_secret = Figaro.env.access_key_secret
  config.access_key_id = Figaro.env.access_key_id
  config.action = 'SendSms'                       # default value
  config.format = 'XML'                           # http return format, value is 'JSON' or 'XML'
  config.region_id = 'cn-hangzhou'                # default value
  config.sign_name = Figaro.env.sign_name
  config.signature_method = 'HMAC-SHA1'           # default value
  config.signature_version = '1.0'                # default value
  config.version = '2017-05-25'                   # default value
end
aliyun-sms 提供了调用方法Aliyun::Sms.send,我稍微进行了封装,封装后的method只有一个参数phone number。
新增lib/sms.rb, 内容如下:
module Send
  module Sms
    def sms_send(phone)
      template_code = Figaro.env.template_code
      code = rand(100000..999999)
      template_param = {"code" => code.to_s}.to_json
      Aliyun::Sms.send(phone, template_code, template_param)
      code
    end
  end
end

class Object
  include Send::Sms
end
修改app/controllers/phone_tokens_controller.rb, 添加上relative_require, 加载下:
require_relative '../../lib/sms'
OK,短信发送完成!
下面给授权页面添加上手机验证的表单。
Step4、在授权页面添加手机验证
修改app/views/devise/registrations/new.html.erb, 添加上手机验证:
<%= form_for(resource, as: resource_name, url: registration_path(resource_name)) do |f| %>
  <div class="weui-cells_title">请输入您的手机号,绑定会员</div>
  <div class="weui-cells weui-cells_form">
    <div class="weui-cell weui-cell_vcode">
      <div class="weui-cell__hd">
        <%= f.label :手机号, class: 'weui-label' %>
      </div>
      <div class="weui-cell__bd weui-cell_primary">
        <%= f.text_field :phone, class: 'weui-input',id: 'user_cellphone',type: "tel", placeholder: '请输入手机号' %>
      </div>
      <div class="weui-cell__ft">
        <input type="button" style="background: none; border: none " value="获取验证码" class="weui-vcode-btn" id="token_btn">获取验证码</input>
      </div>
    </div>

    <div class="weui-cell weui-cell_vcode">
      <div class="weui-cell__hd">
        <%= f.label :验证码, class: 'weui-label' %>
      </div>
      <div class="weui-cell__bd weui-cell_primary">
        <%= f.text_field :token, class:"weui-input", type: "number", placeholder: "请输入验证码" %>
      </div>
    </div>

  </div>

    <label for="weuiAgree" class="weui-agree">
      <input id="weuiAgree" type="checkbox" checked="checked" class="weui-agree__checkbox">
      <span class="weui-agree__text">
        获得您的公开信息(昵称,头像等)
    </span>
    </label>

  <div class="weui-btn-area">
    <%= f.submit "确认", class: 'weui-btn weui-btn_primary' %>
    <a href="javascript:wx.closeWindow();" class="weui-btn weui-btn_plain-default">关闭</a>
  </div>
<% end %>
点击获取验证码的按钮,调用phone_tokens的create 方法,发送验证码,同时phone_token插入或更新一个record。
修改app/views/devise/registrations/new.html.erb, 在最下面添加如下代码:「这里也一并加上手机验证码的60秒倒计时特效和手机号的验证」
<script>
        (function(){
            // 手机验证码
            var CELLPHONE_RE = /^1[3|4|5|6|7|8][0-9]{9}$/;
            var token_wait = 60, token_interval;
            var $token_btn = $('#token_btn');
            $token_btn.click(function () {
                var $this = $(this), cellphone = $('#user_cellphone').val();
                $.ajax({
                    url: "/phone_tokens?phone=" + cellphone,
                    method: 'post',
                    beforeSend: function () {
                        if (!CELLPHONE_RE.test(cellphone)) {
                            alert("手机号码格式错误,请重填!");
                            $('#user_cellphone').val("");
                            return false;
                        }
                        $this.attr('value',"已发送").prop('disabled', true);
                    },
                    success: function (data) {
                        if (data.status == 'error') {
                            alert(data.message);
                            $token_btn.attr('value','获取验证码').prop('disabled', false);
                        }else if(data.status == 'repeated'){
                            alert("您的手机号已经验证过,无需验证");
                        }else
                        {
                            $token_btn.attr('value','已发送').prop('disabled', true);
                            $this.trigger('start_token_timer');
                        }
                    }
                })
            })
                .on('start_token_timer', function () {
                    token_interval = setInterval(function () {
                        $token_btn.trigger('token_timer');
                    }, 1000);
                })
                .on('token_timer', function () {
                    token_wait--;
                    if (token_wait <= 0) {
                        clearInterval(token_interval);
                        $token_btn.attr('value','获取验证码').prop('disabled', false);
                        token_wait = 60;
                    } else {
                        $token_btn.attr('value','重新发送 ' + token_wait + ' 秒').prop('disabled', true);
                    }
                })
        })()
    </script>
以上,手机验证码的发送基本完成,下面来完成验证码的验证,即用户填写的验证码就是发送给他的验证码。
Step5、给User添加字段phone,并验证token填写正确
执行:
rails g migration add_phone_to_users
在生成的migration文档中,修改成这样:
class AddPhoneToUsers < ActiveRecord::Migration[5.1]
  def change
    add_column :users, :phone, :string
  end
end
执行:
rake db:migrate
修改app/controllers/users/registrations_controller.rb的configure_sign_up_params method:
def configure_sign_up_params
  devise_parameter_sanitizer.permit(:sign_up, keys: %i[phone token])
end
这样在授权页面用户必须输入手机和验证码才能通过。
修改app/models/user.rb,添加验证码的检验,如下:
class User < ActiveRecord::Base
  # Include default devise modules. Others available are:
  # :confirmable, :lockable, :timeoutable and :omniauthable
  devise :database_authenticatable, :registerable,
         :recoverable, :rememberable, :trackable, :validatable, :omniauthable

  attr_accessor :token
  CELLPHONE_RE = /^1[3|4|5|6|7|8][0-9]{9}$/

  before_validation :set_password
  validates_presence_of :phone
  validate :validate_phone, on: :create

  def self.from_omniauth(auth)
    ......
  end

  def self.new_with_session(params, session)
    ......
  end

  def email_required?
    false
  end

  private
  def set_password
    self.password ||= Devise.friendly_token[0, 20]
  end

  def validate_phone
    if phone.nil?
      errors.add :base, '手机号不能为空'
    elsif !PhoneToken.find_by(phone: phone, token: token)
      errors.add :phone, '手机验证码不正确或已过期,请重填'
    end
  end

end
通过validate_phone 这个method,来检验用户输入的token是否正确。
OK,基本功能已经完成!
最后,简单的美化一下弹窗。
Step6、美化报错的弹窗
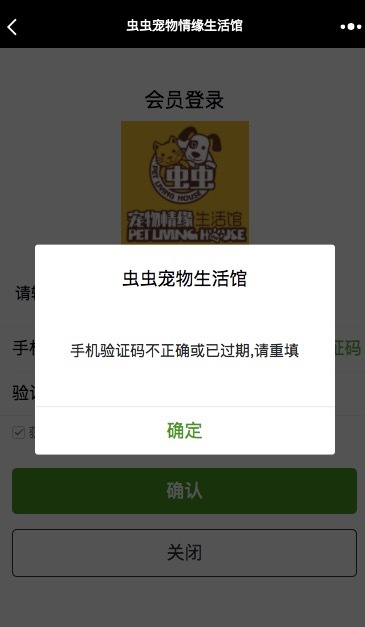
上面new.html.erb中的alert是自带的弹窗,无法定制,很是难看,此外,当用户输入错误的验证码后,user.rb中error message也会弹出,置于页面顶层,很难看:
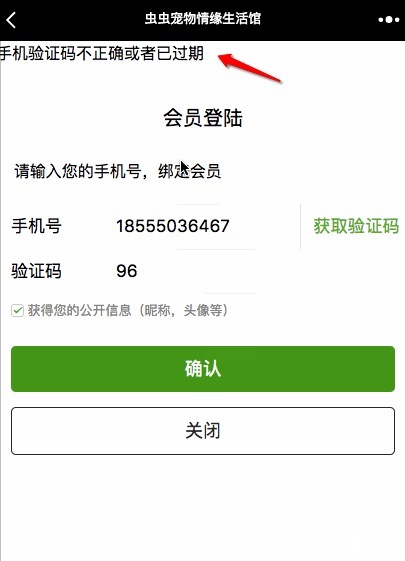
鉴于这里涉及的代码较多,就不放了,参看这个gist,修改app/views/devise/registrations/new.html.erb, 最后的效果长这样:
参考
因为没有搜到合适的教程,所以参考的是付费课程手机短信验证码注册、短信通知,跟着修修改改做的,该课程的最终参考来源:蛋人网。